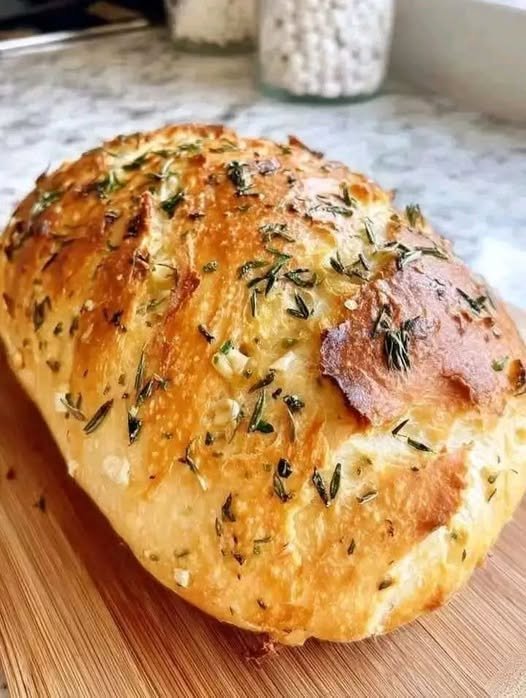
Ingredients
For the Bread
- 2 cups (240 g) gluten-free all-purpose flour blend with xanthan gum
- 1 teaspoon instant yeast
- 1 teaspoon salt
- 1 tablespoon honey or granulated sugar
- 1½ cups (360 ml) warm water
- 2 tablespoons olive oil
- 1 teaspoon apple cider vinegar
For the Garlic Topping
- 4 tablespoons unsalted butter, melted, or olive oil
- 4–5 garlic cloves, finely minced
- 1 tablespoon fresh parsley, finely chopped
- ¼ teaspoon salt
- 2 tablespoons grated Parmesan, optional
- ½ teaspoon dried Italian herbs, optional
Instructions
1. Prepare the Dough
Begin by placing the gluten-free flour blend in a large mixing bowl. Add the instant yeast, salt, and honey or sugar. Whisk the dry ingredients together thoroughly so that the yeast and salt are evenly distributed.
Gradually pour in the warm water while stirring with a wooden spoon or sturdy spatula. Add the olive oil and apple cider vinegar. Continue mixing until everything is well combined.
The dough will not look like traditional wheat bread dough. It should be soft, sticky, and thick, almost like a very heavy batter. This is completely normal. Resist the temptation to add a large amount of extra flour because doing so can make the finished loaf dry and dense.
2. Let the Dough Rise
Cover the bowl tightly with plastic wrap, a reusable cover, or a clean kitchen towel. Place it somewhere warm and draft-free.
Allow the dough to rest for approximately 60–90 minutes. During this time, the yeast will produce carbon dioxide, causing the dough to become lighter and puffier.
Gluten-free dough may not always double in size as dramatically as conventional bread dough. Look instead for visible bubbles, increased volume, and a slightly airy appearance.
If your kitchen is particularly cold, the rising time may be longer. A warm but not hot location will help the yeast work efficiently.
3. Preheat the Oven
While the dough is rising, preheat your oven to 220°C (425°F).
If you are using a Dutch oven, place it in the oven while it preheats. A preheated Dutch oven creates a hot, enclosed environment that helps the loaf develop a crisp crust.
If you do not have a Dutch oven, don’t worry. You can bake the bread on a parchment-lined baking tray instead.
4. Shape the Loaf
Once the dough has finished resting, place a sheet of parchment paper on your work surface. Lightly oil your hands or wet them with water.
Scrape the dough onto the parchment and gently shape it into a round or oval loaf. You do not need to knead, fold, or aggressively shape the dough. Simply gather it into a reasonably even shape.
Because the dough is gluten-free, it will not behave like elastic wheat dough. Handle it gently and avoid trying to create a smooth, stretchy surface.
Transfer the parchment and dough into your Dutch oven, if using one.
5. Bake the Bread
If using a Dutch oven, cover it with the lid and bake for 25 minutes. Then carefully remove the lid and continue baking for another 15–20 minutes, or until the loaf is golden brown and the crust feels firm.
For a baking tray, bake the loaf uncovered for approximately 35–45 minutes.
The exact baking time can vary depending on your oven, the flour blend you use, and the shape of your loaf. The finished bread should have a deeply golden exterior.
For the best texture, avoid slicing the bread immediately after removing it from the oven. Gluten-free bread needs time to cool and set.
6. Make the Garlic Butter
While the bread is baking, prepare the garlic topping.
Melt the butter in a small bowl. Stir in the finely minced garlic, chopped parsley, and salt. If desired, add dried Italian herbs for extra flavor.
For a richer, cheesier garlic bread, stir in a little grated Parmesan. You can also reserve some Parmesan for sprinkling over the loaf before its final few minutes in the oven.
If you prefer an oil-based version, simply replace the melted butter with extra-virgin olive oil.
7. Add the Garlic Topping
When the bread is baked, remove it from the oven and generously brush the entire surface with the garlic butter.
For an especially flavorful loaf, make a few shallow cuts across the top and brush the garlic butter into those openings. This allows the butter and garlic to reach deeper into the bread.
If using Parmesan, sprinkle it over the top.
Return the bread to the oven for approximately 3–5 minutes. This short final bake helps the garlic become fragrant and allows the cheese to melt and lightly brown.
Keep a close eye on it during this stage because minced garlic can burn quickly.
8. Cool Before Slicing
Remove the bread from the oven and place it on a cooling rack. Allow it to cool for at least 20 minutes before slicing.
Although it may be tempting to cut into the loaf immediately, allowing it to cool gives the crumb time to finish setting. Cutting it too early can result in a gummy or fragile interior.
Once slightly cooled, slice the bread with a serrated knife and serve warm.
Tips for Perfect Gluten-Free Garlic Bread
The flour blend you choose makes a significant difference. Use a gluten-free all-purpose blend designed for bread or general baking, preferably one that already contains xanthan gum. If your flour blend does not contain xanthan gum, you may need to add an appropriate amount according to the manufacturer’s instructions.
The consistency of the dough is also important. Gluten-free flour blends absorb water differently, so you may need a small adjustment. If the dough looks extremely dry, add a tablespoon or two of water. If it is excessively loose, allow it to rest for several minutes before deciding whether it needs additional flour.
Use warm rather than hot water. Water that is too hot can damage the yeast, while cool water will slow fermentation.
For stronger garlic flavor, add an extra clove or two to the topping. For a milder flavor, lightly sauté the garlic in the butter before brushing it onto the bread.
You can also customize the loaf with shredded mozzarella, Parmesan, cheddar, fresh rosemary, chili flakes, or a little black pepper.
Serving Suggestions
This garlic bread is best served warm. Pair it with tomato soup, creamy mushroom soup, pasta with marinara sauce, baked vegetables, grilled chicken, or a fresh green salad.
For an easy cheesy version, slice the loaf almost all the way through, spread garlic butter between the slices, add mozzarella, and bake until the cheese is bubbling and golden.
Leftovers can be wrapped and stored at room temperature for a day or refrigerated for several days. Reheat individual slices in a toaster oven or conventional oven to restore some of the crispness.
The bread can also be frozen. Slice it first, wrap the slices well, and freeze them in an airtight container. Reheat directly from frozen until warm and crisp.
Final Thoughts
This Gluten-Free No-Knead Garlic Bread proves that homemade gluten-free bread doesn’t have to be complicated. There is no kneading, no special bread machine, and no complicated shaping technique. With a simple flour blend, yeast, water, olive oil, and a handful of pantry ingredients, you can create a rustic loaf with a crisp crust and tender interior.
The generous garlic-butter topping is what turns the basic loaf into something truly special. Serve it fresh from the oven while the crust is crisp, the center is warm, and the garlic aroma is at its best. Whether you’re making it for a family dinner, a weekend meal, or simply because you’re craving homemade bread, this easy recipe is one worth keeping on repeat.

