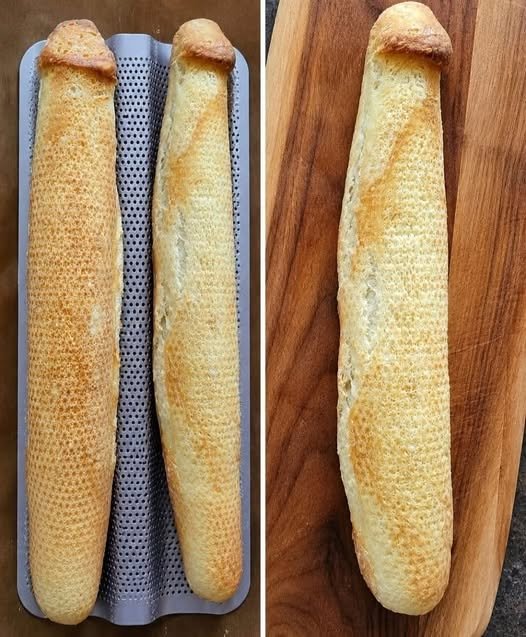
Ingredients
- 3½ cups (440 g) bread flour
- 1½ cups (360 ml) lukewarm water
- 2 teaspoons instant yeast
- 1½ teaspoons salt
- 1 teaspoon honey or sugar, optional
- Extra flour, for shaping
- Cornmeal or parchment paper, for baking
The flour is one of the most important ingredients. Bread flour is ideal because its higher protein content helps create the characteristic chewy texture of a baguette. You can use all-purpose flour if necessary, but the finished bread may be slightly less chewy.
Use water that feels comfortably warm rather than hot. Extremely hot water can damage the yeast.
Instructions
1. Mix the Dough
Add the bread flour and instant yeast to a large mixing bowl. If using honey or sugar, add it at this stage as well. Stir briefly to distribute the ingredients.
Pour in the lukewarm water and mix with a wooden spoon or your hands until the flour is mostly incorporated.
Add the salt and continue mixing until you have a rough, sticky dough. Don’t worry if it looks uneven at this point. The dough will become smoother as it rests and develops.
Cover the bowl with a clean kitchen towel or plastic wrap and let it rest for about 15–20 minutes.
2. Develop the Dough
After the initial rest, you can develop the dough without extensive traditional kneading.
Wet your hands, grab one side of the dough, stretch it upward, and fold it over itself. Rotate the bowl and repeat this process several times.
Perform a series of stretch-and-folds every 15–20 minutes for approximately one hour. You should gradually notice the dough becoming smoother, stronger, and more elastic.
This technique helps develop gluten while keeping the process relatively easy.
3. First Rise
Cover the dough and allow it to rise at room temperature for approximately 1½–2 hours, or until it has noticeably increased in volume.
The exact timing will depend on the temperature of your kitchen. A warm kitchen will speed up fermentation, while a cooler kitchen will slow it down.
For even more flavor, you can refrigerate the dough overnight after the first rise. Slow fermentation allows the dough to develop a deeper, more complex flavor and can make the baguettes taste more like those from an artisan bakery.
4. Divide the Dough
Lightly flour your work surface and gently transfer the dough onto it.
Avoid aggressively punching down the dough. You want to preserve as much of the fermentation-created air as possible.
Divide the dough into three approximately equal pieces.
Shape each piece into a loose rectangle. Cover the pieces with a clean towel and let them rest for about 15–20 minutes.
This short rest allows the gluten to relax, making the dough easier to shape.
5. Shape the Baguettes
Take one piece of dough and gently flatten it into a rectangle.
Fold the upper third toward the center and press the seam lightly. Fold the lower third upward and press again.
Then fold the dough in half lengthwise and pinch the seam closed.
Using both hands, gently roll the dough outward from the center toward the ends until you have a long, narrow baguette.
Aim for a length of approximately 35–40 cm (14–16 inches), depending on the size of your baking tray.
Repeat with the remaining dough.
Place the shaped baguettes seam-side down on parchment paper or a floured baguette cloth. Leave enough space between them so they don’t touch during their final rise.
6. Final Proof
Cover the baguettes loosely and allow them to proof for approximately 30–45 minutes.
They should become visibly puffy but don’t necessarily need to double in size.
While they are proofing, preheat your oven to 240°C (465°F).
Place a sturdy metal baking pan on a lower oven rack. This will later be used to create steam.
7. Score the Baguettes
Once the baguettes have finished proofing, use a very sharp knife, bread lame, or razor blade to make several diagonal cuts along the surface.
Traditionally, baguettes have several long, overlapping slashes.
Make the cuts confidently and at a slight angle. Avoid repeatedly dragging the blade through the dough because this can deflate it.
Scoring gives the expanding bread a controlled place to release pressure during baking and creates the beautiful ridges associated with classic baguettes.
8. Create Steam and Bake
Carefully transfer the baguettes to a hot baking tray or baking stone.
Immediately pour a cup of hot water into the preheated metal pan on the lower rack and quickly close the oven door.
The steam is extremely important. It keeps the surface of the dough flexible during the early part of baking, allowing the baguettes to expand and helping create a thin, crisp crust.
Bake at 240°C (465°F) for approximately 15 minutes.
Then carefully remove the steam pan, reduce the oven temperature to 220°C (425°F), and continue baking for another 10–15 minutes.
The baguettes should be deeply golden brown and sound hollow when tapped underneath.
For an especially crisp crust, leave them in the switched-off oven with the door slightly open for another 5 minutes.
9. Cool Before Serving
Transfer the baguettes to a wire rack and let them cool for at least 20–30 minutes.
Although the aroma may make it difficult to wait, cooling allows the interior crumb to finish setting.
Slice with a serrated bread knife rather than a regular kitchen knife to avoid crushing the delicate interior.
Tips for Crispy, Chewy Baguettes
Don’t rush fermentation. Time is one of the biggest contributors to flavor. If you have time, refrigerate the dough overnight.
Use enough steam. Steam helps produce a thin, crisp crust and encourages good oven spring.
Don’t add too much flour. The dough should be somewhat sticky. Excess flour can result in a dense baguette.
Handle the dough gently. Fermentation creates air bubbles that contribute to an open, airy crumb. Rough handling can knock too much of that air out.
Bake until deeply golden. Pale baguettes often lack the crisp crust and developed flavor of properly baked bread.
Serving Ideas
Fresh baguettes are incredibly versatile. Serve slices with salted butter, jam, honey, or soft cheese for breakfast.
For lunch, use the baguette to make sandwiches filled with roasted chicken, vegetables, cheese, or cured meats.
The bread is also excellent alongside tomato soup, French onion soup, creamy mushroom soup, pasta, or roasted vegetables.
For a simple appetizer, slice the baguette and toast it with olive oil, garlic, and herbs. You can also top toasted slices with tomatoes and basil for an easy bruschetta.
If the baguette becomes slightly stale, don’t throw it away. Turn it into croutons, breadcrumbs, French toast, or a rustic bread pudding.
Storage
Baguettes are best eaten on the day they’re baked because the crust gradually loses its crispness.
If you need to store one, keep it at room temperature in a paper bag for up to a day. Avoid storing fresh baguettes in the refrigerator because refrigeration can make bread stale more quickly.
For longer storage, slice the baguette and freeze it in an airtight freezer bag. Individual slices can be reheated directly from frozen in a hot oven or toaster.
Final Thoughts
Making homemade French baguettes is a rewarding baking project that relies more on technique and patience than complicated ingredients. With good bread flour, proper fermentation, gentle shaping, and plenty of steam, you can create baguettes with a beautifully crisp crust and a chewy, flavorful interior.
The first attempt may not look perfectly uniform, and that’s part of the charm of homemade bread. Focus on developing the dough, creating steam, and baking until deeply golden. Once you become comfortable with the process, you’ll find yourself making these baguettes whenever you want the taste and aroma of fresh bakery bread at home.

