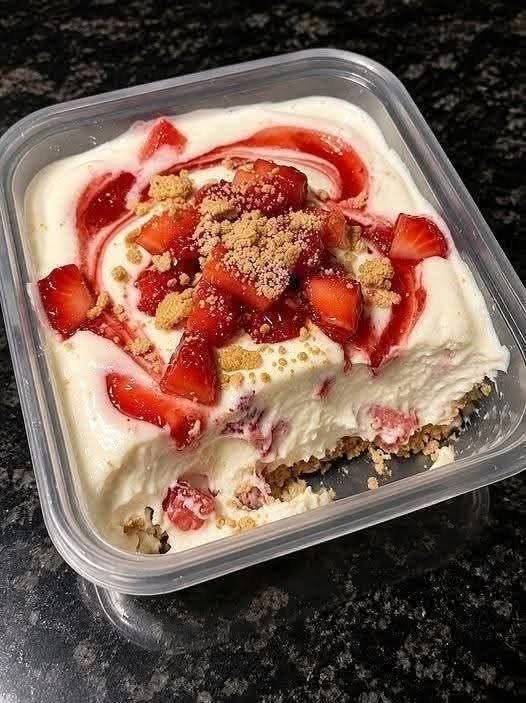
Ingredients
For the Crust
- 2 cups (200 g) graham cracker crumbs
- ¼ cup (50 g) granulated sugar
- ½ cup (115 g) unsalted butter, melted
- ¼ teaspoon salt
For the Cheesecake Filling
- 32 oz (900 g) full-fat cream cheese, softened
- 1 cup (200 g) granulated sugar
- 1 tablespoon cornstarch
- 4 large eggs, room temperature
- 1 cup (240 g) sour cream
- 2 teaspoons vanilla extract
- 1 tablespoon fresh lemon juice
- 1 teaspoon finely grated lemon zest, optional
For the Strawberry Topping
- 2 cups fresh strawberries
- ¼ cup granulated sugar
- 1 tablespoon fresh lemon juice
- 1 tablespoon cornstarch
- 2 tablespoons water
- ½ teaspoon vanilla extract
Optional Garnish
- Fresh whole strawberries
- Whipped cream
- Mint leaves
- Powdered sugar
Instructions
1. Prepare the Pan
Preheat your oven to 325°F (165°C).
Use a 9-inch springform pan for the cheesecake.
Lightly grease the bottom and sides of the pan. You can also place a round piece of parchment paper on the bottom to make removing the cheesecake easier.
If you plan to use a water bath, wrap the outside bottom and sides of the springform pan tightly with two layers of heavy-duty aluminum foil. This helps prevent water from entering the pan.
2. Make the Graham Cracker Crust
Place the graham cracker crumbs in a mixing bowl.
Add the granulated sugar, salt, and melted butter.
Stir until the crumbs are evenly moistened. The mixture should resemble wet sand and hold together when pressed.
Transfer the mixture to the prepared springform pan.
Use the bottom of a measuring cup or a flat glass to press the crumbs firmly and evenly across the bottom of the pan.
For a slightly more traditional cheesecake crust, press the crumbs approximately 1 inch up the sides.
Bake the crust for 8–10 minutes.
Remove it from the oven and allow it to cool while you prepare the filling.
3. Prepare the Cheesecake Filling
Make sure the cream cheese is completely softened before mixing.
Place the cream cheese in a large bowl and beat on low to medium speed until smooth.
Add the sugar and cornstarch.
Mix just until combined.
Avoid beating the mixture excessively because incorporating too much air can cause the cheesecake to puff during baking and then crack as it cools.
Add the eggs one at a time, mixing on low speed after each addition.
Scrape down the sides of the bowl as needed.
4. Add the Remaining Ingredients
Add the sour cream, vanilla extract, lemon juice, and lemon zest if using.
Mix gently until the filling is completely smooth.
Do not overmix.
The finished batter should be thick, creamy, and free of large lumps.
Pour the cheesecake filling over the cooled crust.
Gently tap the pan against the countertop a few times to release large air bubbles.
5. Bake the Cheesecake
For an especially creamy cheesecake, place the springform pan inside a larger roasting pan.
Pour hot water into the roasting pan until it reaches approximately halfway up the sides of the springform pan.
Carefully transfer the pans to the oven.
Bake at 325°F (165°C) for approximately 60–75 minutes.
The edges should look set, while the center should still have a gentle wobble when the pan is carefully moved.
Do not wait for the center to become completely firm. The cheesecake will continue to set as it cools.
If you don’t want to use a water bath, place the cheesecake directly on the oven rack and bake for approximately the same amount of time. The surface may be slightly more likely to crack.
6. Cool the Cheesecake Gradually
Turn off the oven and leave the cheesecake inside with the oven door slightly open for approximately 30–60 minutes.
This gradual cooling helps reduce the chance of cracks caused by sudden temperature changes.
Remove the cheesecake from the oven and allow it to cool to room temperature.
Once cooled, cover it and refrigerate for at least 6 hours, preferably overnight.
Do not rush this step. Proper chilling gives the cheesecake its firm yet creamy texture.
7. Prepare the Strawberry Topping
Wash the strawberries thoroughly and remove the green tops.
Slice approximately half of the strawberries.
Place the sliced strawberries in a saucepan with the sugar and lemon juice.
Cook over medium heat for approximately 3–5 minutes, stirring gently, until the berries begin releasing their juices.
In a small bowl, mix the cornstarch and water until smooth.
Add the cornstarch mixture to the strawberries.
Cook for another 1–2 minutes, stirring constantly, until the sauce thickens.
Remove from the heat and stir in the vanilla extract.
Allow the strawberry topping to cool completely.
For a chunkier topping, leave some strawberry pieces intact. For a smoother sauce, mash the berries gently while cooking.
8. Assemble the Cheesecake
Once the cheesecake has chilled completely, carefully release the sides of the springform pan.
Transfer the cheesecake to a serving plate.
Spoon the cooled strawberry topping over the surface, spreading it gently toward the edges.
Decorate with additional fresh strawberries.
For an elegant finish, add small swirls of whipped cream around the edge.
9. Slice and Serve
Use a sharp knife to slice the cheesecake.
For especially clean slices, dip the knife in hot water, wipe it dry, and then cut through the cheesecake. Repeat between slices.
Serve chilled.
The creamy cheesecake, buttery crust, and sweet-tart strawberries are best enjoyed together in every bite.
Tips for a Perfect Cheesecake
Use room-temperature cream cheese. Cold cream cheese can leave lumps in the filling.
Don’t overmix. Excessive mixing incorporates air, which can contribute to cracks.
Use full-fat cream cheese. It provides the richest texture and helps the cheesecake set properly.
Don’t overbake. The center should still have a slight wobble when the cheesecake comes out of the oven.
Cool gradually. Sudden temperature changes can cause the surface to crack.
Chill thoroughly. Six hours is a minimum recommendation, while overnight chilling usually produces the best texture.
Variations
Chocolate Strawberry Cheesecake
Add ½ cup melted and cooled semisweet chocolate to the cheesecake batter. Top with strawberries and chocolate shavings.
No-Bake Strawberry Cheesecake
Use a no-bake cheesecake filling and refrigerate until firm instead of baking.
Strawberry Swirl Cheesecake
Reserve some strawberry sauce and swirl it gently into the cheesecake batter before baking.
White Chocolate Strawberry Cheesecake
Add melted white chocolate to the filling for a richer, sweeter variation.
Storage
Store the cheesecake covered in the refrigerator.
For the best quality, enjoy it within approximately 3–4 days.
Individual slices can also be wrapped tightly and frozen for up to approximately 2 months. Thaw them overnight in the refrigerator before serving.
Frequently Asked Questions
Why did my cheesecake crack?
Overmixing, overbaking, or sudden temperature changes can contribute to cracks. A gentle baking temperature and gradual cooling help.
Can I use frozen strawberries?
Yes, particularly for the cooked topping. Fresh strawberries are best for garnish.
Can I make this cheesecake a day ahead?
Yes. Cheesecake is actually an excellent make-ahead dessert. Preparing it the day before allows it to chill thoroughly.
How do I know when the cheesecake is done?
The edges should be set, while the center should still have a slight wobble. It will firm up as it cools.
Final Thoughts
Classic Strawberry Cheesecake is a timeless dessert that combines a crisp buttery crust, smooth cream cheese filling, and vibrant strawberry topping. While it takes some time to bake and chill, the preparation itself is straightforward.
For the best results, use full-fat ingredients, avoid overmixing the filling, bake gently, and give the cheesecake plenty of time to cool and set. The finished dessert is creamy, rich, fruity, and impressive enough for any special occasion.
Prep time: 30 minutes
Bake time: 60–75 minutes
Cooling and chilling: At least 6 hours
Total time: Approximately 7–8 hours
Servings: 10–12
Difficulty: Intermediate

