Ingredients
- 200 g (7 oz) good-quality dark or semi-sweet chocolate, chopped
- 1 cup (240 ml) heavy whipping cream, divided
- 3 large eggs, separated
- ¼ cup (50 g) granulated sugar
- 1 teaspoon pure vanilla extract
- Pinch of salt
- 1 tablespoon unsalted butter, optional
For Topping
- Whipped cream
- Chocolate shavings
- Fresh strawberries or raspberries
- Unsweetened cocoa powder
- Fresh mint, optional
Choose a chocolate with a cocoa percentage that suits your taste. Dark chocolate produces a richer, more intense mousse, while semi-sweet chocolate creates a sweeter and milder dessert.
Instructions
1. Melt the Chocolate
Place the chopped chocolate in a heatproof bowl.
Set the bowl over a saucepan containing a small amount of gently simmering water. The bottom of the bowl should not touch the water. This creates a gentle double boiler and helps prevent the chocolate from overheating.
Stir occasionally until the chocolate is completely melted and smooth.
Remove the bowl from the heat and allow the chocolate to cool slightly. It should remain fluid but shouldn’t be extremely hot when you combine it with the other ingredients.
If desired, stir in the tablespoon of butter while the chocolate is still warm. The butter adds richness and creates an especially smooth texture.
2. Whip the Cream
Pour half of the heavy cream into a chilled mixing bowl.
Using a hand mixer or stand mixer, beat the cream until it forms soft peaks. Be careful not to overwhip it. The cream should be fluffy and hold its shape but still look smooth and creamy.
Place the whipped cream in the refrigerator while you prepare the remaining ingredients.
3. Prepare the Egg Yolks
Place the egg yolks in a separate bowl and whisk them with half of the sugar.
Add the vanilla extract and continue whisking until the mixture becomes slightly lighter and creamy.
For a traditional mousse, the yolks help create a rich and luxurious texture.
If you’re concerned about using raw eggs, use pasteurized eggs. Alternatively, you can prepare the yolk mixture gently over a double boiler while whisking constantly until it reaches 71°C (160°F), then remove it from the heat and proceed with the recipe.
4. Combine the Chocolate and Egg Yolks
Slowly add the slightly cooled melted chocolate to the egg-yolk mixture.
Stir gently until thoroughly combined.
Make sure the chocolate isn’t piping hot, as excessive heat can cause the yolks to scramble.
The mixture should become thick, glossy, and deeply chocolatey.
5. Whip the Egg Whites
Place the egg whites in a completely clean, dry mixing bowl.
Add a small pinch of salt and beat until they begin to become foamy.
Gradually add the remaining sugar while continuing to beat.
Keep mixing until the egg whites form medium to stiff peaks. When you lift the whisk, the peaks should stand upright without collapsing immediately.
The whipped egg whites are what give the mousse its characteristic light and airy texture.
6. Fold Everything Together
Remove the whipped cream from the refrigerator.
Add approximately one-third of the whipped cream to the chocolate mixture and gently fold it in. This lightens the chocolate base and makes it easier to incorporate the remaining ingredients.
Next, fold in the remaining whipped cream.
Finally, gently fold in the whipped egg whites in two or three additions.
Use a large spatula and a slow folding motion. Cut down through the center, scoop underneath, and lift the mixture over itself.
Avoid vigorous stirring because it can deflate the air bubbles you’ve worked so hard to create.
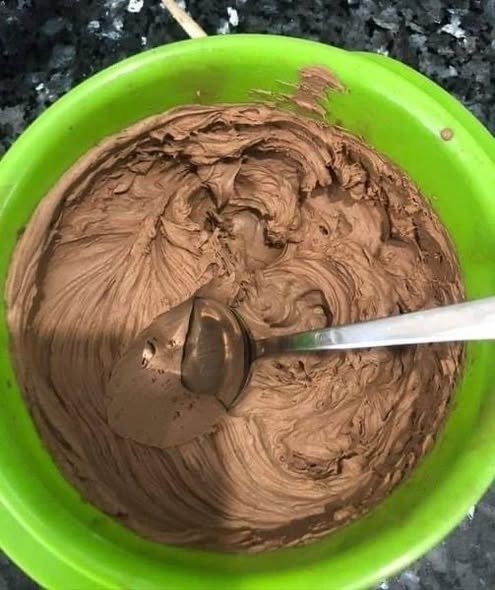
The finished mousse should be smooth, airy, and evenly colored.
7. Chill the Mousse
Divide the chocolate mousse among individual dessert glasses, ramekins, or small bowls.
Cover each portion and refrigerate for at least 2–4 hours.
For the best texture, you can prepare the mousse the day before and let it chill overnight.
As it rests, the mousse will become firmer while maintaining its soft, creamy texture.
8. Add the Toppings
Just before serving, decorate each portion with your favorite toppings.
A small spoonful of freshly whipped cream works beautifully. Add dark chocolate curls or finely grated chocolate for an elegant finish.
Fresh raspberries and strawberries provide a bright, slightly tart contrast to the richness of the mousse.
For a simple presentation, dust the top lightly with unsweetened cocoa powder.
A tiny mint leaf can also add a fresh pop of color.
Tips for Perfect Chocolate Mousse
Use Good-Quality Chocolate
Because chocolate is the star ingredient, its flavor has a major impact on the final dessert. Choose chocolate that you genuinely enjoy eating.
For a less sweet mousse, use dark chocolate with a higher cocoa percentage. For a sweeter dessert, use semi-sweet chocolate.
Don’t Overheat the Chocolate
Chocolate can seize or become grainy if exposed to excessive heat or water. Melt it slowly and gently.
If using a microwave, heat it in short 15–20-second intervals, stirring between each interval.
Fold Gently
The air incorporated into the whipped cream and egg whites gives mousse its light texture. Folding too aggressively will remove that air and produce a heavier dessert.
Give It Enough Chilling Time
Although the mousse may look ready soon after mixing, chilling is essential. It allows the chocolate to set and gives the mousse its signature spoonable consistency.
Easy Variations
Orange Chocolate Mousse
Add 1 teaspoon of finely grated orange zest to the melted chocolate. The citrus aroma pairs beautifully with dark chocolate.
Mint Chocolate Mousse
Add a small amount of peppermint extract to the chocolate mixture. Start with just a few drops because peppermint extract is powerful.
Coffee Chocolate Mousse
Mix 1 teaspoon of instant espresso powder into the warm melted chocolate. Coffee enhances the depth of chocolate flavor without necessarily making the mousse taste like coffee.
Berry Chocolate Mousse
Fold a small amount of finely chopped fresh berries into the mousse just before portioning, or simply use fresh berries as a topping.
Making It Gluten-Free
The basic mousse ingredients are naturally gluten-free, but packaged chocolate, flavorings, toppings, and decorations can sometimes contain gluten or be produced in facilities with cross-contact.
If you are serving someone with celiac disease, carefully check every packaged ingredient and use products specifically labeled or certified gluten-free when appropriate.
Also make sure your bowls, utensils, mixer attachments, and work surfaces are clean and free from crumbs or other gluten-containing foods.
Storage
Store the finished mousse covered in the refrigerator.
It is best enjoyed within 2–3 days. Keep it chilled until you’re ready to serve.
Because this recipe contains eggs and dairy, avoid leaving the mousse at room temperature for extended periods.
Final Thoughts
This Gluten-Free Chocolate Mousse is proof that an impressive dessert doesn’t need to be complicated. A few quality ingredients, careful melting, gentle folding, and a little patience are all you need to create a silky, rich, and airy chocolate dessert.
Whether you’re serving it after a family dinner or presenting it at a special celebration, individual portions make the mousse look elegant with very little extra effort. Add fresh berries and chocolate shavings for a restaurant-style presentation, or keep it simple with a dusting of cocoa powder.
Once you master the basic recipe, experiment with orange, coffee, mint, or berries to create your own favorite version. Most importantly, serve it well chilled and enjoy every spoonful of this decadent gluten-free chocolate treat.

