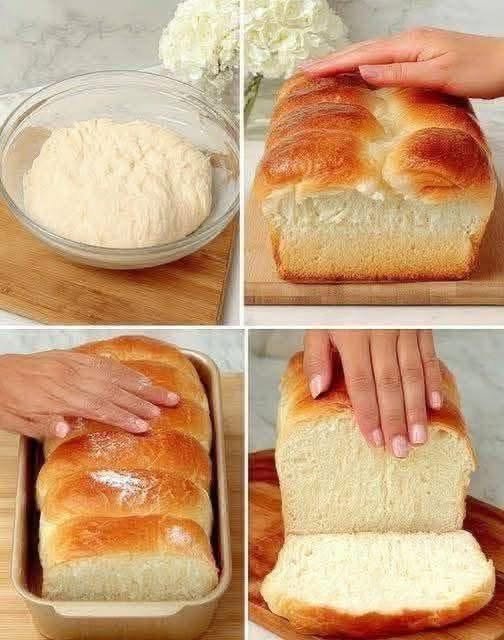
Ingredients
- 2 cups (480 ml) warm water, about 105–110°F (40–43°C)
- ⅔ cup (135 g) white granulated sugar
- 1½ tablespoons (about 14 g) active dry yeast
- 1½ teaspoons salt
- ¼ cup (60 ml) vegetable oil
- 6 cups (720–780 g) all-purpose flour, approximately
- Butter, for brushing the finished bread, optional
Instructions
1. Activate the Yeast
Begin by pouring the warm water into a large mixing bowl. The water should feel comfortably warm rather than hot. If the water is too hot, it can damage the yeast.
Add the sugar and stir until it is mostly dissolved. Sprinkle the active dry yeast over the water and leave the mixture undisturbed for approximately 5–10 minutes.
The yeast should become foamy or bubbly on the surface. This indicates that the yeast is active and ready to use. If there is little or no activity, the yeast may be old or the water may have been too hot or too cold, so it is best to start again with fresh yeast.
2. Add the Oil and Salt
Once the yeast has become foamy, add the vegetable oil and salt. Stir gently to combine.
Begin adding the flour, about one cup at a time. Mix after each addition. As more flour is added, the mixture will gradually become a soft dough.
You may not need the entire amount of flour. The exact quantity can vary depending on humidity, flour type, and how the flour is measured. The goal is to make a dough that is soft and slightly tacky but not excessively sticky.
3. Knead the Dough
Transfer the dough to a lightly floured work surface. Knead it by hand for about 8–10 minutes.
To knead, push the dough away from you with the heel of your hand, fold it back toward yourself, turn it slightly, and repeat. Continue until the dough becomes smooth and elastic.
If the dough sticks heavily to your hands or the work surface, add a little more flour, about one tablespoon at a time. Avoid adding too much flour because a very stiff dough can produce dense bread.
You can also knead the dough using a stand mixer fitted with a dough hook. Mix on low speed until the ingredients come together, then knead on medium-low speed for approximately 6–8 minutes.
4. First Rise
Place the kneaded dough in a lightly oiled bowl. Turn the dough once so that its surface is lightly coated with oil.
Cover the bowl with a clean kitchen towel, plastic wrap, or a lid. Place it somewhere warm and allow the dough to rise for approximately 1 hour, or until it has doubled in size.
The rising time depends on the temperature of your kitchen. In a warm environment, the dough may rise faster; in a cool room, it can take longer.
Do not worry if the dough takes more than an hour. The important thing is that it approximately doubles in size.
5. Shape the Loaves
Once the dough has doubled, gently press it down to release excess air.
Turn the dough onto a lightly floured surface and divide it into two equal portions. Shape each portion into a loaf.
To shape a loaf, gently flatten the dough into a rectangle. Fold the long sides toward the center and then roll the dough tightly from one short end to the other. Pinch the seam closed and place the loaf seam-side down in a greased 9 × 5-inch loaf pan.
Repeat with the second portion of dough.
If you prefer smaller loaves, you can divide the dough into three portions and use smaller loaf pans.
6. Second Rise
Cover the loaf pans loosely with a clean towel and allow the dough to rise again for approximately 30–45 minutes.
The dough should become noticeably puffy and rise above or close to the top edge of the loaf pans.
Be careful not to let the dough overproof. If it rises too much, it can collapse during baking.
While the dough is completing its second rise, preheat your oven to 350°F (175°C).
7. Bake the Bread
Place the risen loaves in the preheated oven.
Bake for approximately 30–35 minutes, or until the tops are golden brown and the loaves sound hollow when gently tapped.
If the tops begin browning too quickly, loosely cover them with aluminum foil during the final portion of baking.
For a more reliable check, the center of the loaf should reach approximately 190–200°F (88–93°C).
Remove the bread from the oven and allow it to cool in the pans for about 10 minutes. Then carefully remove the loaves from the pans and transfer them to a wire rack.
For a soft, flavorful crust, brush the warm loaves with a little butter.
8. Cool Before Slicing
Although it can be tempting to slice the bread immediately, allowing it to cool for at least 30–60 minutes will give the crumb time to finish setting.
Use a serrated bread knife to cut clean slices without crushing the soft interior.
Helpful Tips
Use warm, not hot, water. Water that is too hot can kill the yeast. Aim for approximately 105–110°F (40–43°C).
Don’t add too much flour. A slightly soft dough generally produces lighter bread. Add flour gradually rather than automatically using the entire six cups.
Give the dough enough time to rise. Rising depends on room temperature, so use the dough’s appearance rather than the clock as your main guide.
Knead thoroughly. Proper kneading develops gluten, which helps the bread become stretchy, airy, and strong enough to hold its shape.
Let the bread cool. Cutting into a loaf while it is extremely hot can make the interior seem gummy.
Storage
Store completely cooled bread in an airtight container or bread bag at room temperature for approximately 3–4 days.
For longer storage, wrap the bread tightly and freeze it for up to about 3 months. You can freeze the loaf whole or slice it first so individual pieces can be removed as needed.
Serving Ideas
Amish White Bread is delicious in many ways. Serve slices warm with butter and honey, use it to make sandwiches, or toast it for breakfast. It also works beautifully for French toast, grilled cheese sandwiches, bread pudding, and simple toast with jam.
Recipe Summary
This recipe makes approximately 2 loaves of soft homemade white bread. The combination of sugar, oil, and proper kneading gives the bread its characteristic tender texture and mildly sweet flavor. With just a little patience during the two rising stages, you can make bakery-style bread at home using everyday ingredients.
Prep time: 20–25 minutes
Rising time: 1½–2 hours
Baking time: 30–35 minutes
Total time: Approximately 2½–3 hours
Yield: 2 loaves

