Ingredients
For one medium rustic loaf, you will need:
- 400 g bread flour
- 300 g lukewarm water
- 8 g fine sea salt
- 1 g instant yeast, approximately ¼ teaspoon
- 1 tablespoon finely chopped fresh rosemary
- 4–5 cloves roasted or finely minced garlic
- 1 tablespoon olive oil
- Extra flour for shaping
- Extra rosemary for topping, optional
- Flaky sea salt, optional
Fresh rosemary gives the best flavor, but dried rosemary can be used if necessary. If using dried rosemary, reduce the quantity because its flavor is more concentrated.
Step 1: Prepare the Garlic
Roasted garlic gives this bread a sweeter, softer flavor than raw garlic.
To roast the garlic, preheat your oven to approximately 190°C (375°F).
Place several unpeeled garlic cloves on a small piece of foil and drizzle them with a tiny amount of olive oil. Wrap the foil loosely around the garlic and roast for approximately 25–35 minutes, or until the cloves become soft and golden.
Allow them to cool before squeezing the garlic from the skins.
Mash the roasted garlic into a paste using a fork.
If you want a quicker version, you can simply mince fresh garlic and add it directly to the dough.
Step 2: Mix the Dough
Add the bread flour, instant yeast, and salt to a large mixing bowl.
Add the chopped rosemary and mashed roasted garlic.
Pour in the lukewarm water and olive oil.
Using a wooden spoon or your hands, mix everything together until no large patches of dry flour remain.
The dough will be sticky and shaggy. Do not add large amounts of flour to make it smooth. The high hydration is part of what gives the finished bread its rustic texture.
Once everything is combined, cover the bowl tightly with plastic wrap or a clean reusable cover.
Step 3: Let the Dough Ferment
Leave the dough at room temperature for approximately 12–18 hours.
Overnight fermentation works particularly well.
During this time, the yeast slowly develops the dough’s flavor and structure. You should see the dough become noticeably larger, bubbly, and airy.
The exact fermentation time depends on your kitchen temperature. A warmer room will speed up fermentation, while a cooler room will slow it down.
Do not worry if the dough looks messy. No-knead dough often looks quite rough during fermentation.
Step 4: Prepare the Dough for Shaping
Once the dough has fermented, generously flour your work surface.
Scrape the dough out of the bowl using a dough scraper or spatula.
The dough will still be sticky, so use flour on your hands if necessary.
Gently fold the edges toward the center several times.
You do not need to knead it. The goal is simply to create a rough round shape and build enough surface tension to help the loaf hold its form.
Turn the dough seam-side down.
Step 5: Rest the Dough
Place a sheet of parchment paper on your work surface.
Transfer the shaped dough onto the parchment.
Cover it loosely with a clean towel and let it rest for approximately 30–60 minutes.
While the dough rests, begin preheating the oven.
Step 6: Preheat the Dutch Oven
Place a Dutch oven with its lid inside your oven.
Preheat the oven to 230°C (450°F).
Allow the Dutch oven to heat for at least 30 minutes.
A properly preheated Dutch oven is one of the secrets to achieving a beautiful crust. The enclosed environment traps steam released from the dough, allowing the bread to expand before the crust sets.
Be extremely careful when handling the hot Dutch oven.
Step 7: Score the Bread
Once the dough has rested, use a sharp bread lame or razor blade to make one or two shallow cuts across the top.
You can make a simple slash or create a decorative pattern.
Scoring gives the expanding bread a controlled place to open during baking.
For an attractive finish, sprinkle a little chopped rosemary and flaky sea salt over the surface.
Step 8: Bake the Bread
Carefully remove the hot Dutch oven from the oven.
Using the parchment paper as a sling, lower the dough into the Dutch oven.
Cover with the lid.
Bake for approximately 30 minutes with the lid on.
The covered environment traps steam and helps produce a crisp, blistered crust.
After 30 minutes, carefully remove the lid.
Continue baking for another 10–15 minutes, or until the loaf becomes deeply golden brown.
If you prefer a darker crust, you can bake it for a few additional minutes, keeping a close eye on it.
Step 9: Cool Completely
Remove the finished loaf from the Dutch oven.
Transfer it to a wire rack.
Allow it to cool for at least one hour before slicing.
This can be difficult because the smell will be incredible, but cutting the bread too early can cause the interior to become gummy.
As the loaf cools, the crumb continues to set and develop its final texture.
What to Expect
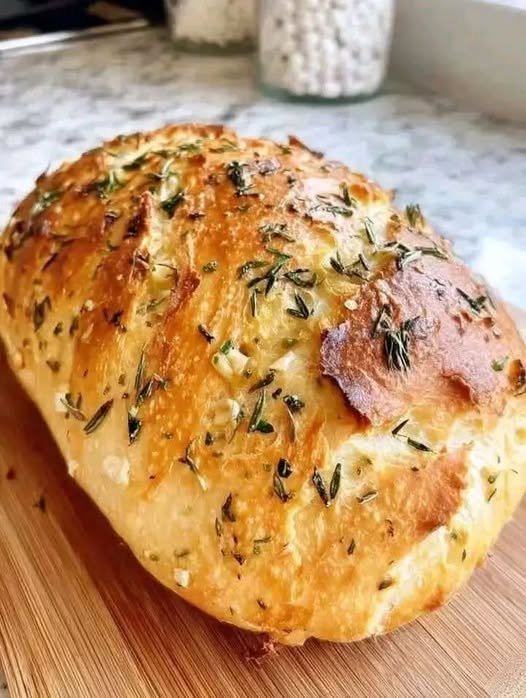
The finished bread should have a crisp, rustic crust with a soft and slightly chewy interior.
The roasted garlic provides a mellow sweetness, while rosemary adds an aromatic herbal flavor.
The long fermentation gives the loaf a deeper flavor than a quick bread recipe, despite the extremely simple preparation.
Every slice should have irregular air pockets throughout the crumb, giving the loaf that classic rustic appearance.
Serving Ideas
This bread is delicious served warm with salted butter.
It also pairs beautifully with:
- Tomato soup
- Creamy vegetable soup
- Pasta
- Roast chicken
- Grilled vegetables
- Fresh salads
- Stews
- Cheese boards
- Olive oil and balsamic vinegar
For an especially indulgent snack, toast a thick slice and top it with mozzarella, tomatoes, fresh basil, and a drizzle of olive oil.
You can also use leftovers to make garlic toast, croutons, breadcrumbs, or rustic sandwiches.
Storage
Once completely cool, store the bread in a paper bag or bread box at room temperature.
Avoid storing crusty bread in the refrigerator because refrigeration can cause it to become stale more quickly.
For longer storage, slice the loaf and freeze the slices in a sealed freezer-safe bag.
Individual slices can be reheated directly from frozen in a toaster or oven.
Troubleshooting
If the bread is too dense, the dough may not have fermented sufficiently, or the yeast may have been inactive.
If the dough is extremely sticky, resist the temptation to add excessive flour. Use lightly floured hands and a dough scraper instead.
If the crust is too pale, remove the Dutch oven lid earlier or extend the uncovered baking time.
If the bread is burning underneath, place a baking sheet on a lower oven rack to provide some insulation.
If the loaf spreads rather than rising upward, it may have been over-proofed or insufficiently shaped.
Final Tips
The beauty of this recipe is its simplicity. There is no complicated kneading process, no special mixer, and no need for advanced bread-baking skills.
The most important ingredient is time. Allowing the dough to ferment overnight gives the yeast enough opportunity to create flavor and develop the dough.
Use fresh rosemary and good-quality garlic whenever possible, and make sure your Dutch oven is thoroughly preheated.
When the loaf finally emerges from the oven, the combination of crackling crust, fragrant rosemary, and rich garlic aroma makes the wait worthwhile.
Slice it thick, spread it with butter, and enjoy it while it is still slightly warm. This rustic no-knead rosemary garlic bread is simple enough for a weekday dinner but impressive enough to place at the center of a holiday table.

