Ingredients
For the Dough
- 100 g active sourdough starter, bubbly and recently fed
- 300 g bread flour
- 50 g whole-wheat flour
- 220 g lukewarm water
- 25 g honey
- 20 g unsalted butter, softened
- 7 g fine sea salt
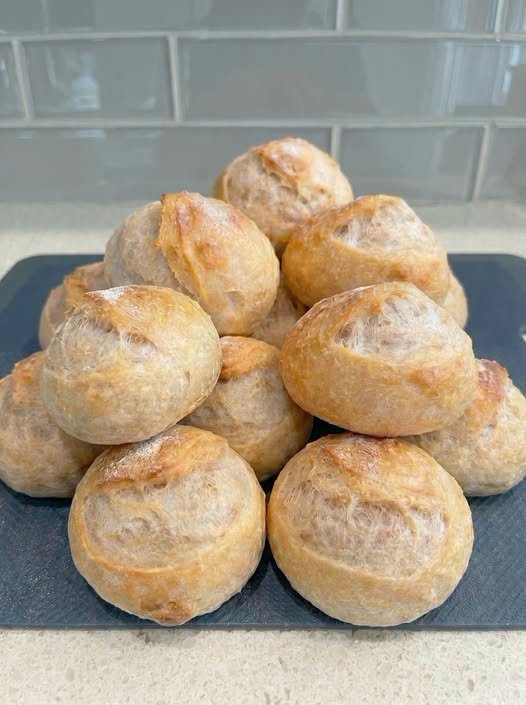
This quantity makes approximately 10–12 mini slider loaves, depending on the size you choose.
For the best results, use an active starter that has risen significantly after feeding and has a pleasant, mildly fermented aroma. A weak or inactive starter may produce dense loaves.
Step 1: Mix the Dough
Add the active sourdough starter and lukewarm water to a large mixing bowl.
Stir until the starter is mostly dispersed through the water.
Add the bread flour and whole-wheat flour. Mix with your hands or a wooden spoon until no large patches of dry flour remain.
The dough will look rough and slightly sticky at this stage. That is completely normal.
Cover the bowl and let the mixture rest for approximately 30 minutes.
This resting period allows the flour to hydrate and begins gluten development naturally.
Step 2: Add the Remaining Ingredients
After the initial rest, add the honey, softened butter, and salt.
Work the ingredients into the dough using your hands.
At first, the dough may feel slippery because of the butter. Continue folding and squeezing gently until everything is incorporated.
Once the dough becomes more cohesive, begin strengthening it with folds.
Grab one side of the dough, stretch it upward without tearing it, and fold it over the center. Rotate the bowl and repeat from another side.
Perform approximately four folds around the dough.
Cover the bowl again.
Step 3: Bulk Fermentation
Allow the dough to ferment at room temperature.
The exact fermentation time depends heavily on the temperature of your kitchen and the strength of your sourdough starter. Instead of relying only on the clock, watch the dough.
During the first two hours, perform a set of stretch-and-folds approximately every 30 minutes.
After each set, the dough should gradually become smoother, stronger, and more elastic.
Eventually, the dough should become noticeably puffy and increase in volume.
You do not necessarily need it to double in size. A rise of approximately 50–75%, combined with visible bubbles and a lighter texture, is often a good indication that bulk fermentation is progressing well.
Step 4: Divide the Dough
Once bulk fermentation is complete, lightly flour your work surface.
Gently turn the dough out of the bowl.
Try not to aggressively press all the air out.
Divide the dough into 10–12 equal portions.
For uniform slider buns, weighing each piece is helpful. Depending on your desired size, portions of approximately 55–70 g work well.
Shape each portion into a small, tight ball.
To create surface tension, pull the edges of the dough underneath itself while gently rotating the dough against the work surface.
Place each shaped piece on a parchment-lined baking tray.
Leave a little space between them so they have room to expand.
Step 5: Final Proof
Cover the tray loosely with plastic wrap or a clean damp towel.
Allow the mini loaves to proof at room temperature.
Again, the timing will vary. Depending on the temperature and starter activity, this can take approximately 1–3 hours.
The dough should become noticeably puffier and lighter.
To test whether the loaves are ready, gently press one with a fingertip. The indentation should slowly begin to spring back.
If it immediately springs back, the dough may need more time.
If it collapses and does not recover, it may have been over-proofed.
Step 6: Prepare for Baking
Preheat your oven to 200°C (400°F).
For an especially attractive finish, brush the tops of the loaves lightly with milk or beaten egg.
An egg wash will produce a deeper, shinier golden crust, while milk gives a softer, more subtle finish.
You can also sprinkle the tops with sesame seeds, poppy seeds, everything seasoning, or a few flakes of sea salt.
If you want a simple bakery-style appearance, leave them plain.
Step 7: Bake
Place the tray in the preheated oven.
Bake for approximately 18–23 minutes, or until the loaves are beautifully golden brown.
Because these are small loaves, they bake considerably faster than a traditional sourdough boule.
Keep an eye on them during the final few minutes. You want the crust to develop a rich golden color without becoming excessively dark.
Once baked, remove the tray from the oven.
Allow the loaves to cool for at least 20–30 minutes before slicing.
Although it can be tempting to tear into them immediately, cooling allows the interior crumb to finish setting.
The Perfect Texture
When you cut into one of these mini loaves, the interior should be soft and tender with a fine, slightly open crumb.
The crust should have enough structure to hold the bread together but remain soft enough for a slider.
The sourdough flavor should be noticeable without overwhelming the other ingredients.
If you prefer a stronger sourdough flavor, you can extend the fermentation, particularly through an overnight refrigerated proof.
Overnight Option
For additional flavor, you can place the shaped loaves in the refrigerator after shaping.
Cover the tray well and refrigerate overnight.
The following day, remove the loaves from the refrigerator and allow them to sit at room temperature while the oven preheats.
Depending on how much they have already risen, they may need a little additional proofing.
The longer, cooler fermentation develops a deeper and more complex sourdough flavor.
Serving Ideas
These mini loaves are incredibly versatile.
Fill them with:
- Pulled chicken and coleslaw
- Mini cheeseburgers
- Grilled chicken and lettuce
- Roast beef and caramelized onions
- Turkey and cheese
- Crispy chicken and spicy sauce
- Egg salad
- Tuna salad
- Grilled vegetables and hummus
For parties, arrange the finished sliders on a large serving board with sauces, pickles, vegetables, and other toppings.
Because the loaves are individually sized, guests can easily grab one without having to cut a large loaf.
Storage
Once completely cooled, store the mini loaves in an airtight container or bread bag.
They are best enjoyed within a few days.
For longer storage, freeze them in a sealed freezer-safe bag. Allow them to cool completely before freezing.
When ready to serve, thaw at room temperature and warm briefly in the oven.
You can also slice the loaves before freezing if you already know you will use them for sandwiches.
Final Tips for Show-Stopping Loaves
Use an active starter. This is one of the most important factors in successful sourdough baking.
Pay attention to the dough rather than following the fermentation times blindly. Temperature, starter strength, flour, and hydration can all affect fermentation.
Do not add excessive flour while shaping. A slightly tacky dough can still produce wonderfully soft bread.
Build enough surface tension during shaping so the loaves rise upward rather than spreading outward.
Most importantly, give the dough enough time. Sourdough rewards patience.
These mini sourdough slider loaves may be small, but they have everything you want from homemade bread: a golden exterior, tender crumb, subtle tang, and plenty of personality. Put them on the table next to your favorite fillings and watch what happens—the sliders may have been the plan, but these little loaves are almost guaranteed to become the main attraction.

