Ingredients
For the ice cream base:
- 2 cups heavy cream, chilled
- 1 cup whole milk
- ¾ cup granulated sugar
- 1 teaspoon pure vanilla extract
- A small pinch of salt
- 18–20 chocolate sandwich cookies, roughly crushed
For the no-churn version:
- 2 cups heavy whipping cream, chilled
- 1 can (14 ounces) sweetened condensed milk
- 1 teaspoon vanilla extract
- A small pinch of salt
- 18–20 chocolate sandwich cookies, roughly crushed
Instructions
1. Prepare the Cookies
Start by preparing the chocolate sandwich cookies. Place them in a sturdy zip-top bag and gently crush them with a rolling pin or the bottom of a glass. You want a mixture of small cookie pieces and slightly larger chunks.
Avoid crushing all of the cookies into fine crumbs. Larger pieces provide a pleasant crunch and make the finished ice cream look more appetizing.
Set the crushed cookies aside while you prepare the ice cream base.
2. Make the Ice Cream Base
For the traditional ice cream-maker method, pour the heavy cream, whole milk, sugar, vanilla extract, and salt into a large bowl.
Whisk the mixture until the sugar has dissolved completely. This may take a couple of minutes. You don’t need to whip the cream; simply combine the ingredients until the mixture is smooth.
Taste the base and adjust the vanilla if desired. The mixture should taste slightly sweeter than you want the final ice cream to taste because freezing reduces the perception of sweetness.
For an even richer result, you can gently heat the milk and sugar in a saucepan until the sugar dissolves, then allow the mixture to cool completely before adding the heavy cream and vanilla.
3. Chill the Mixture
Cover the ice cream base and refrigerate it for at least 2 hours. If you have time, chilling it overnight is even better.
A thoroughly chilled mixture freezes more efficiently and generally produces a smoother texture in an ice cream maker.
Make sure the mixture is cold before proceeding.
4. Churn the Ice Cream
Pour the chilled mixture into your ice cream maker and churn according to the manufacturer’s instructions.
Most machines take approximately 20–30 minutes, but the exact time will vary depending on the machine.
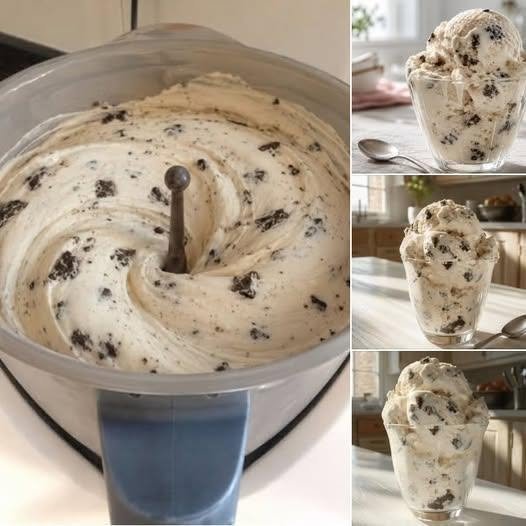
When the ice cream becomes thick and resembles soft-serve ice cream, add most of the crushed cookies. Continue churning for another minute or two, just long enough to distribute the cookies throughout the mixture.
Reserve a small handful of cookie pieces for topping the ice cream later.
5. Freeze Until Firm
Transfer the freshly churned ice cream to a freezer-safe container. A shallow container works particularly well because the ice cream freezes more evenly.
Sprinkle the remaining cookie pieces over the top and gently press them into the surface.
Cover the container tightly and freeze for at least 4–6 hours, or until the ice cream is firm enough to scoop.
For the best texture, allow the ice cream to sit at room temperature for approximately 5–10 minutes before serving.
No-Churn Method
If you don’t have an ice cream maker, you can easily prepare this recipe using the no-churn method.
Begin by pouring the chilled heavy whipping cream into a large mixing bowl. Using an electric mixer, whip the cream until stiff peaks form. Be careful not to overbeat it, as you want a smooth and fluffy whipped cream rather than butter.
In another bowl, combine the sweetened condensed milk, vanilla extract, and salt.
Gently fold the condensed milk mixture into the whipped cream. Use a spatula and fold slowly so that you don’t remove too much air from the whipped cream.
Next, fold in about two-thirds of the crushed cookies.
Transfer the mixture to a freezer-safe loaf pan or container. Spread it evenly and sprinkle the remaining cookies over the top.
Cover tightly with plastic wrap or a suitable lid and freeze for at least 6 hours, preferably overnight.
The result is a creamy, scoopable Cookies & Cream Ice Cream without requiring an ice cream machine.
Helpful Tips for Perfect Ice Cream
Use full-fat dairy whenever possible. The fat in heavy cream and whole milk helps create a creamy texture and reduces the formation of large ice crystals.
Keep your ingredients cold. Chilled ingredients help the ice cream freeze faster, which contributes to a smoother final texture.
Don’t add all the cookies too early. Adding the cookies toward the end of churning helps keep some pieces intact instead of turning everything into crumbs.
Choose a freezer-safe airtight container. Exposure to air can cause ice crystals to form on the surface and may lead to freezer burn.
For easier scooping, remove the ice cream from the freezer about 5–10 minutes before serving. Avoid leaving it out for a long period, especially in a warm kitchen.
Variations
You can customize this recipe in several ways. For extra chocolate flavor, add 2 tablespoons of unsweetened cocoa powder to the ice cream base.
For a stronger vanilla flavor, increase the vanilla extract to 1½ teaspoons.
If you enjoy extra crunch, add additional cookie pieces just before transferring the ice cream to the freezer.
You can also drizzle chocolate syrup into the container as you layer the ice cream for a chocolate-marble effect.
For a fun dessert, serve scoops of Cookies & Cream Ice Cream in a bowl or cone and top them with additional crushed cookies, chocolate sauce, whipped cream, or chocolate shavings.
How to Store Homemade Ice Cream
Keep the ice cream in a tightly sealed freezer-safe container. Homemade ice cream is generally best enjoyed within 1–2 weeks for its freshest texture and flavor, although it can remain frozen longer.
Try to minimize the amount of air in the container. Pressing a piece of parchment paper or plastic wrap directly against the surface before sealing can help reduce ice-crystal formation.
Serving Suggestions
Cookies & Cream Ice Cream is delicious on its own, but it also pairs beautifully with other desserts. Serve it alongside warm brownies, chocolate cake, waffles, pancakes, or freshly baked cookies.
For an easy ice cream sundae, place two scoops in a bowl and add chocolate syrup, crushed cookies, whipped cream, and a few chocolate chips.
You can also use the ice cream to make a milkshake. Simply blend two or three scoops with a little cold milk and a handful of cookies until smooth and creamy.
Final Thoughts
Making Cookies & Cream Ice Cream at home is easier than it may seem. With a handful of simple ingredients and a little patience, you can create a rich, creamy dessert filled with delicious chocolate cookie pieces.
The ice cream-maker method produces an especially smooth and scoopable texture, while the no-churn method is perfect when you want a simple recipe without specialized equipment. Whichever method you choose, be generous with the cookies—they are what make this classic dessert so irresistible.
For the best homemade experience, serve the ice cream slightly softened with extra crushed cookies sprinkled over the top. It makes a wonderful dessert for family dinners, parties, summer gatherings, or simply whenever you’re craving something sweet and creamy.

