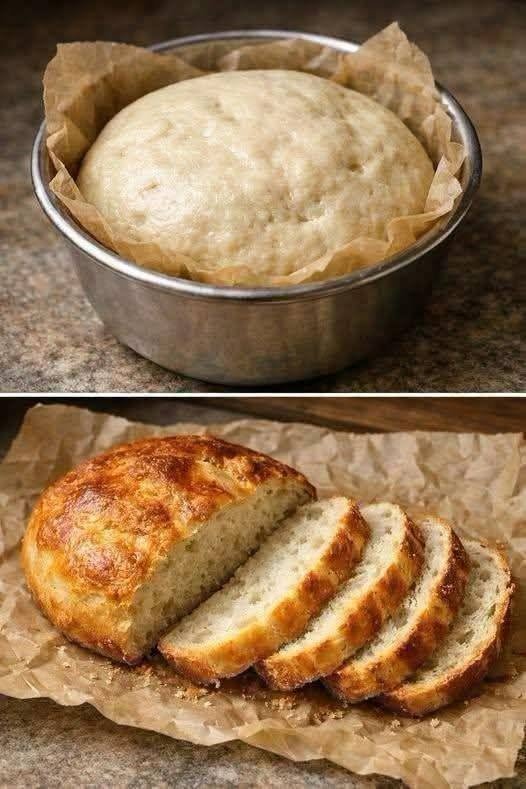
Ingredients
For one generous serving, you’ll need:
- 4 tablespoons all-purpose flour
- ¼ teaspoon baking powder
- A small pinch of salt
- 1 tablespoon vegetable oil or melted butter
- 3 tablespoons milk
- 1 teaspoon water, if needed
- ½ teaspoon sugar, optional
- A little butter or oil for greasing the mug
These ingredients are inexpensive and commonly found in most kitchens. You can substitute whole-wheat flour for part of the all-purpose flour, although using only whole-wheat flour will produce a denser bread.
Milk gives the bread a softer texture, but you can use an unsweetened plant-based milk if preferred.
Equipment
You only need a few things:
- 1 microwave-safe mug
- 1 small spoon or fork
- Microwave
Choose a mug that holds at least 10–12 ounces. Avoid filling the mug more than halfway with batter because the bread will expand as it cooks.
Step-by-Step Instructions
1. Prepare the Mug
Lightly grease the inside of your microwave-safe mug with a little oil or butter. This helps prevent the bread from sticking and makes it easier to remove once cooked.
If you prefer, you can also leave the bread in the mug and eat it directly with a spoon or fork.
2. Mix the Dry Ingredients
Add the flour, baking powder, salt, and optional sugar to the mug. Stir thoroughly with a fork until everything is evenly distributed.
Mixing the dry ingredients first is important because it helps prevent pockets of baking powder or salt from remaining in the finished bread.
3. Add the Wet Ingredients
Pour the milk and oil or melted butter into the mug. Stir until the ingredients form a thick, smooth batter.
The mixture should be thick but spoonable. If it looks excessively dry, add about 1 teaspoon of water or milk and stir again.
Try not to overmix. Once the flour has been incorporated and there are no obvious dry patches, you’re ready to microwave it.
4. Microwave the Bread
Place the mug in the microwave and cook on high power for approximately 60–90 seconds.
Start with 60 seconds. Carefully check the bread. If the center still looks wet or sticky, microwave it for another 10–20 seconds.
Microwave ovens vary considerably in power, so cooking time may differ. A higher-powered microwave may cook the bread in around one minute, while a lower-powered model may require closer to 90 seconds or slightly longer.
Avoid dramatically overcooking the bread, because microwave bread can become dry or rubbery when left in the microwave too long.
5. Let It Rest
Carefully remove the mug from the microwave because it may be hot. Allow the bread to rest for about one minute.
This short resting period allows the interior to finish setting and makes the bread easier to handle.
Run a butter knife around the edge if you want to remove the bread from the mug. Turn the mug upside down over a plate and gently tap the bottom.
How to Tell When Mug Bread Is Done
The top should look set rather than wet, and the bread should feel firm but springy when gently touched.
If you cut into it and discover a wet or doughy center, return it to the microwave for another 10–15 seconds.
Because microwaves cook differently, the first attempt may require a little experimentation. Once you know how quickly your microwave cooks, you can adjust the timing for future batches.
Delicious Ways to Customize It
One of the best things about mug bread is how easy it is to change the flavor.
For a savory version, add a pinch of garlic powder, dried oregano, black pepper, or mixed herbs. A tablespoon of grated cheddar or mozzarella can also create a delicious cheesy bread.
For something slightly sweet, add the optional sugar and try cinnamon, vanilla, or a few raisins. You can serve the finished bread with honey, jam, peanut butter, or chocolate spread.
For extra texture, sprinkle sesame seeds, sunflower seeds, or pumpkin seeds over the batter before microwaving.
You can even turn the finished bread into a quick breakfast sandwich. Slice it carefully in half and fill it with scrambled egg, cheese, vegetables, or cooked meat.
Tips for Perfect Microwave Mug Bread
Use the right mug. A wide microwave-safe mug helps the bread cook more evenly. A very narrow mug may leave the center undercooked while the outside becomes firm.
Don’t overfill it. The batter expands during cooking, so leave plenty of room at the top.
Watch the cooking time. One extra minute can make a big difference in microwave recipes. Start with a shorter cooking time and add additional seconds when necessary.
Measure the flour accurately. Too much flour can make the bread heavy and dry. Spoon the flour into your measuring spoon rather than packing it tightly.
Eat it fresh. Microwave mug bread is best immediately after cooking while it is still warm and tender.
Storage and Reheating
This recipe is designed as a single-serving bread, so it is best eaten immediately. If you have leftovers, allow them to cool completely and store them in an airtight container for up to a day.
To soften leftover bread, microwave it briefly for about 10 seconds. Avoid reheating it for too long because the texture can become tough.
Frequently Asked Questions
Can I use whole-wheat flour?
Yes. You can replace some or all of the all-purpose flour with whole-wheat flour. However, the bread will generally be denser and have a stronger flavor. For a softer result, try using half whole-wheat and half all-purpose flour.
Can I make this without milk?
Yes. Replace the milk with an unsweetened dairy-free alternative or water. Milk generally produces a softer and richer result, but water works in a pinch.
Why did my bread turn rubbery?
The most common reason is overcooking. Microwaves remove moisture quickly, so cooking the bread for significantly longer than necessary can produce a rubbery texture. Try reducing the cooking time by 10–15 seconds next time.
Can I double the recipe?
It’s better to make separate mugs rather than doubling the batter in one mug. A larger amount of batter may cook unevenly, leaving the center undercooked while the outside becomes overdone.
Final Thoughts
This 5-Minute Microwave Mug Bread is a simple way to enjoy warm homemade bread without an oven or lengthy preparation. With just a handful of everyday ingredients, you can mix everything in one mug and have fresh bread ready in minutes.
It may not have exactly the same texture as traditionally baked yeast bread, but that isn’t really the point. This recipe is all about speed, simplicity, and convenience. Whether you’re craving something warm with breakfast, need a quick snack, or simply want to experiment with microwave baking, this mug bread is an easy recipe worth keeping in your kitchen.
Once you master the basic version, experiment with herbs, cheese, spices, seeds, or sweet toppings to create your own favorite variation. Five minutes, one mug, and a few simple ingredients are all you need for a quick homemade bread treat.

